Figma is a great tool for businesses. It has lots of features and layers that you can exploit for each of your needs. There are some simple tricks that empower you to design faster with Figma. These tricks include some shortcuts and capabilities not written anywhere special. However, if you’ve worked with computers long enough, you already know some of them. In this article, we will introduce some of the ways that you can get the most out of your experience with Figma.

If you’ve worked with Adobe XD before, you know that there is a feature called Repeat Grid. Using this feature, you can duplicate a shape several times to form a repetitive grid of that shape or component. In Figma, you can control this in a different way. When you duplicate a component with Ctrl + D, and then, when you move it around, Figma remembers the pattern and the spacing. If you do Ctrl + D once again, the component will be placed with the exact same pattern and spacing that you determined for the previous copy. You can do this several times to form a repeat grid in whatever direction that you want.

Spacebar tricks are a huge thing when it comes to Figma. You can transform the way buttons and functions work just by holding the spacebar while doing them. The first thing that you can do is hold the spacebar while selecting some components. Then you can save that selection size and go around with it to select other components.

Another cool thing you can do with the spacebar, is holding it while resizing a shape. When resizing a shape, holding the spacebar makes you be able to move it around to adjust its position.

One last cool thing you can do is when you want to drag a shape or object into frames or auto-layout frames. Holding the spacebar while doing so will stop Figma from arranging the shape into the frame automatically. This allows you to place it wherever you want.

One of the things that will save you lots of time while you design with Figma is the quick actions menu. If you ever need something but can’t remember what is the shortcut for it, you can use Ctrl + / on Windows or CMD + / on Mac to access the quick actions menu. In this menu, you can access plugins and various other kits, too. In the example below, we are using the quick actions menu to unlock all of the objects and see the keyboard shortcut for it.

Making prototypes have never been easier using Figma. One of the things that is easier on Figma than other UI/UX design software and applications is that you can easily share your prototypes and other people can see your changes to the prototype real-time. One of the greatest things that Figma enables you to do is creating animations using the prototyping smart animate and delay features.
It works just like any other animating software. You can transform each frame into the other as long there are objects on the next frame that correspond to objects on the previous frames. Then, you can add the delay feature instead of “on click” and have the objects move around for you according to the passage of time. You can control all of these in the Prototype section of your workspace.
This functions works like the image below.

The prototype for this turns out to be something like the GIF below. You can see that we only click once to trigger action, and then, it moves on by itself to the next frame.

You can use this in much more advanced types of animations, such as the example below. As long as you understand the process and how it works with respect to the way each object gets displaced and where it is located next and how the sizing and the coloring of each object changes, you can create complicated animations.
This last one helps you a lot if you just want to see all your color options on the screen. You can easily go around the screen and see different colors with their color codes.


There are much more things that you can design with Figma if you unravel the power of plugins. There are plugins such as Unsplash and Content Reel that help you create randomized content for your designs without ever having to type. You can also have ready stock photos for your designs to help you before you get things finalized. The only tip is to practice and just keep practicing. If you need help with your web design process or need a website built, you can always contact the professionals at PengYi Labs to help you in no time.
If you have started doing web design recently, you know that there are several tools for it. One of these great tools is Adobe XD. It is an Adobe product that works great with the Adobe Creative Suite. In this article, we will be covering all that you need to know to start your UI and UX design process with Adobe XD and use it for most of your web design needs.
Many people think because the XD in Adobe XD means Experience Design, Adobe XD must only be useful for UX design. This is a wrong belief, however. Adobe XD is a great tool for both UI and UX design, and in general, web design. It offers most of the things offered by other tools. In addition, you benefit even a lot more of the material provided by the Adobe Creative Suite. Meaning that you can use plugins, textures, etc. The entire library of Adobe is at your service.
You can design the user interface of a website or an app, create beautiful user prototypes, and share the results with your coworkers and fellow web developers. If you have already worked with Figma or Sketch, Adobe XD must seem very familiar to you. You essentially do not have much learning to do, and most of the usage is only about practicing and trying to use the shortcuts to adapt to the workspace presented to you.
Adobe XD almost has all the features of a UI & UX design tool that Figma, Sketch, InVision, etc. offer. However, on Figma and Sketch, you can have several pages open inside a project file. Inside each page, you can have as many frames as you need. On Adobe XD, you can only have one page open for a project file. Inside that one file, you can have lots of artboards to do your web design.
Also, compared to Figma which is online and has real-time sharing, Adobe XD can work offline but does not have real-time design and prototype sharing. You will have to upload the Adobe XD file to the cloud to be able to share it with other people.
Another thing that is a bit harder on Adobe XD is creating wireframes. Wireframes are the first drafts of the layouts of the product. On Figma, you can find wireframe kits that allow you to easily drag and drop pre-made elements to quickly create your wireframes and not care about the lines being too straight. Creating wireframes on Adobe XD alone seems to be very time-consuming and difficult. That is why most people prefer other tools for creating wireframes.
Even though it might seem that Adobe XD lacks more things than it offers, Adobe XD might even overpower the other tools in the huge library of materials offered by Adobe Creative Cloud.
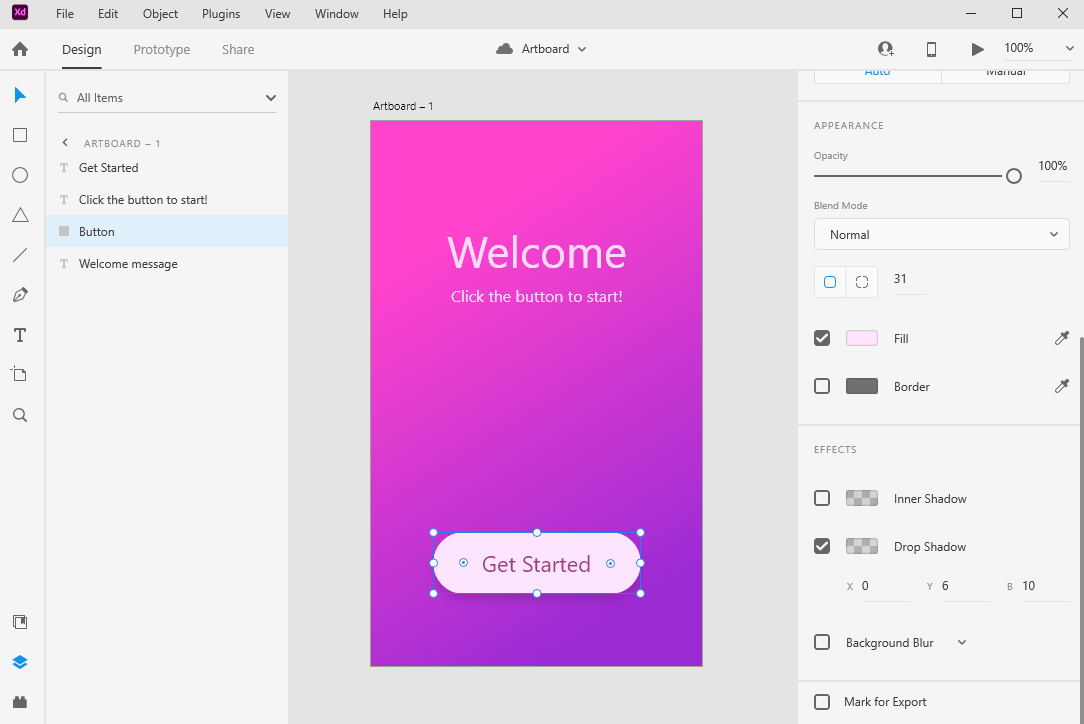
If you want to design the user interface of a product, the design tab has all you need. It is being updated with the latest tools that web designers need constantly. For example, recently, Inner Shadow has been added. You have all the options of creating grids, aligning the contents, making repeat grids, using the overlay method, background blur, object blur, drop shadow, various types of gradients, and many shapes.
In the prototype tab, you can find various ways of creating amazing prototypes for user testing and UX design. You can use auto-animate and transition types of actions and mix them with time delays to create a stream of animations without having to keep triggering buttons. It is very easy to create prototypes and you can do it by simply dragging out the arrows to create action. You can add audio and speech playbacks to the actions, as well.
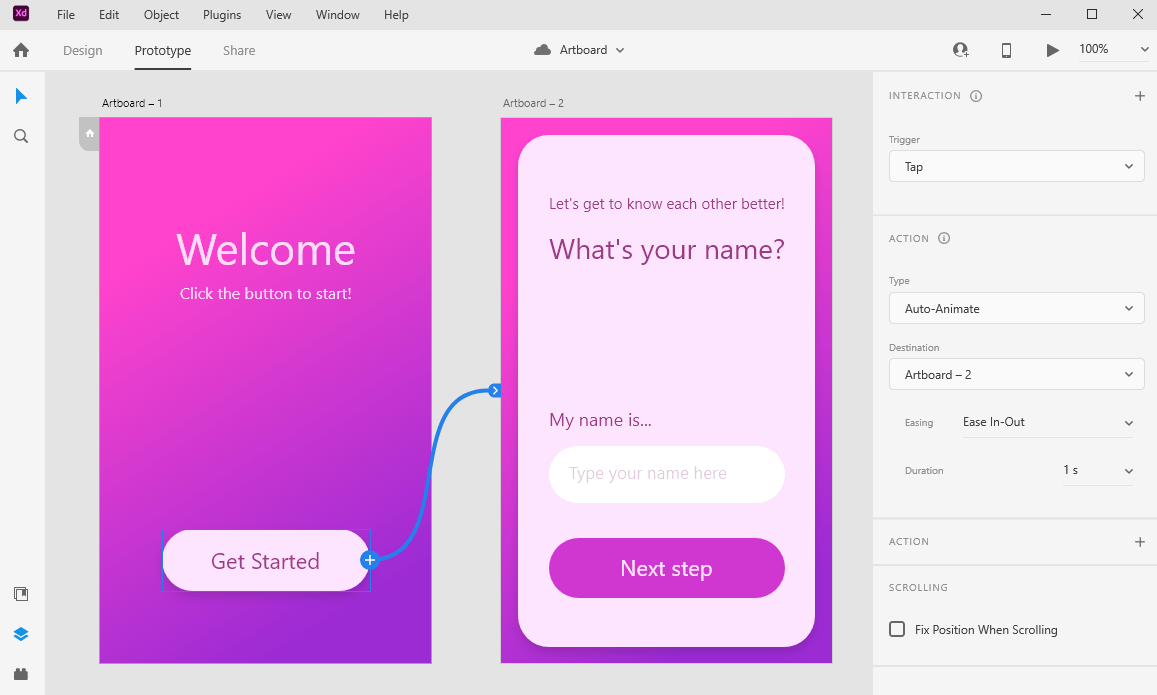
Above you can see an example of a prototype created using Adobe XD. It turns out to be an animation like below.
You can see this animation both on desktop and on the Adobe XD mobile app. The mobile app is a way to use your mobile device to interact with the mobile prototypes easier. You can find it on Google Play and App store.
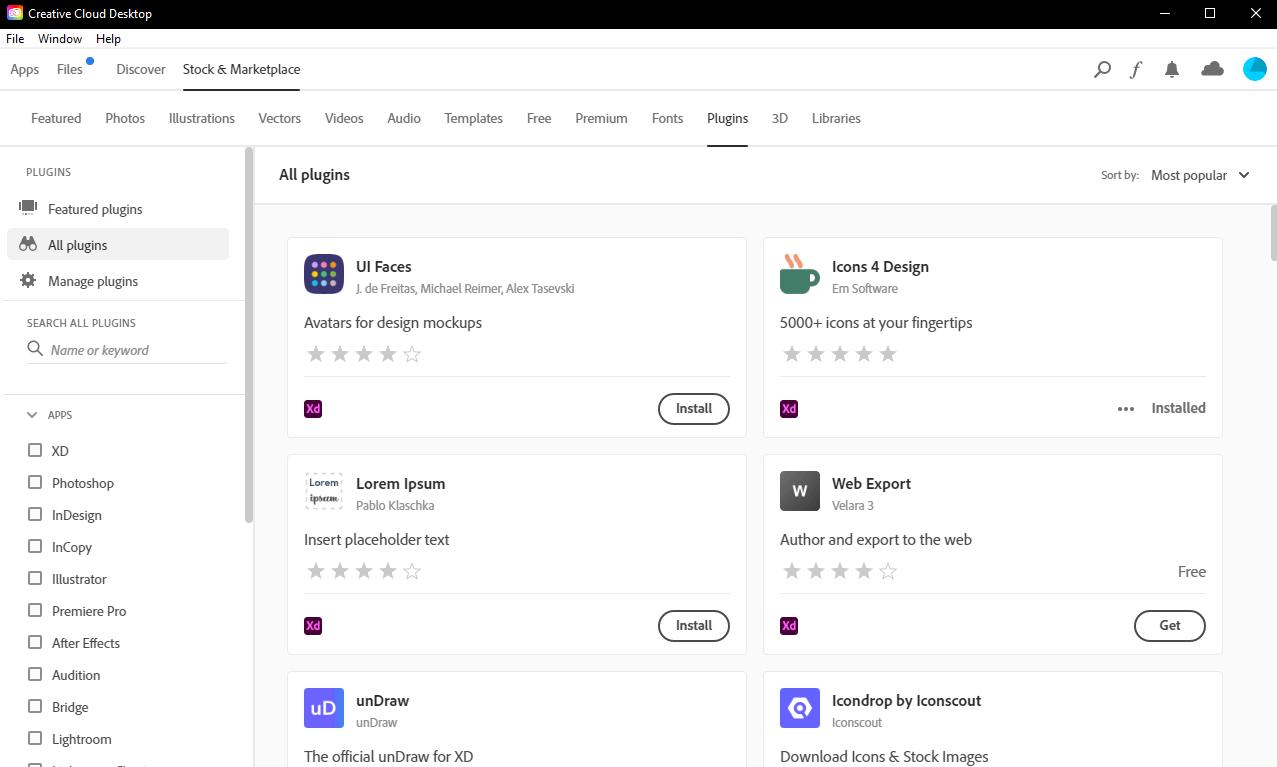
You are definitely going to need some tools to works with Adobe XD faster and easier. You might need placeholder texts, icons, stocks photos, or ready-made pictures to drag and drop and finish your job. There is no need to become a stock photographer to use some generic pictures as placeholders. You can use what is already out there, provided by the Adobe community, for free!
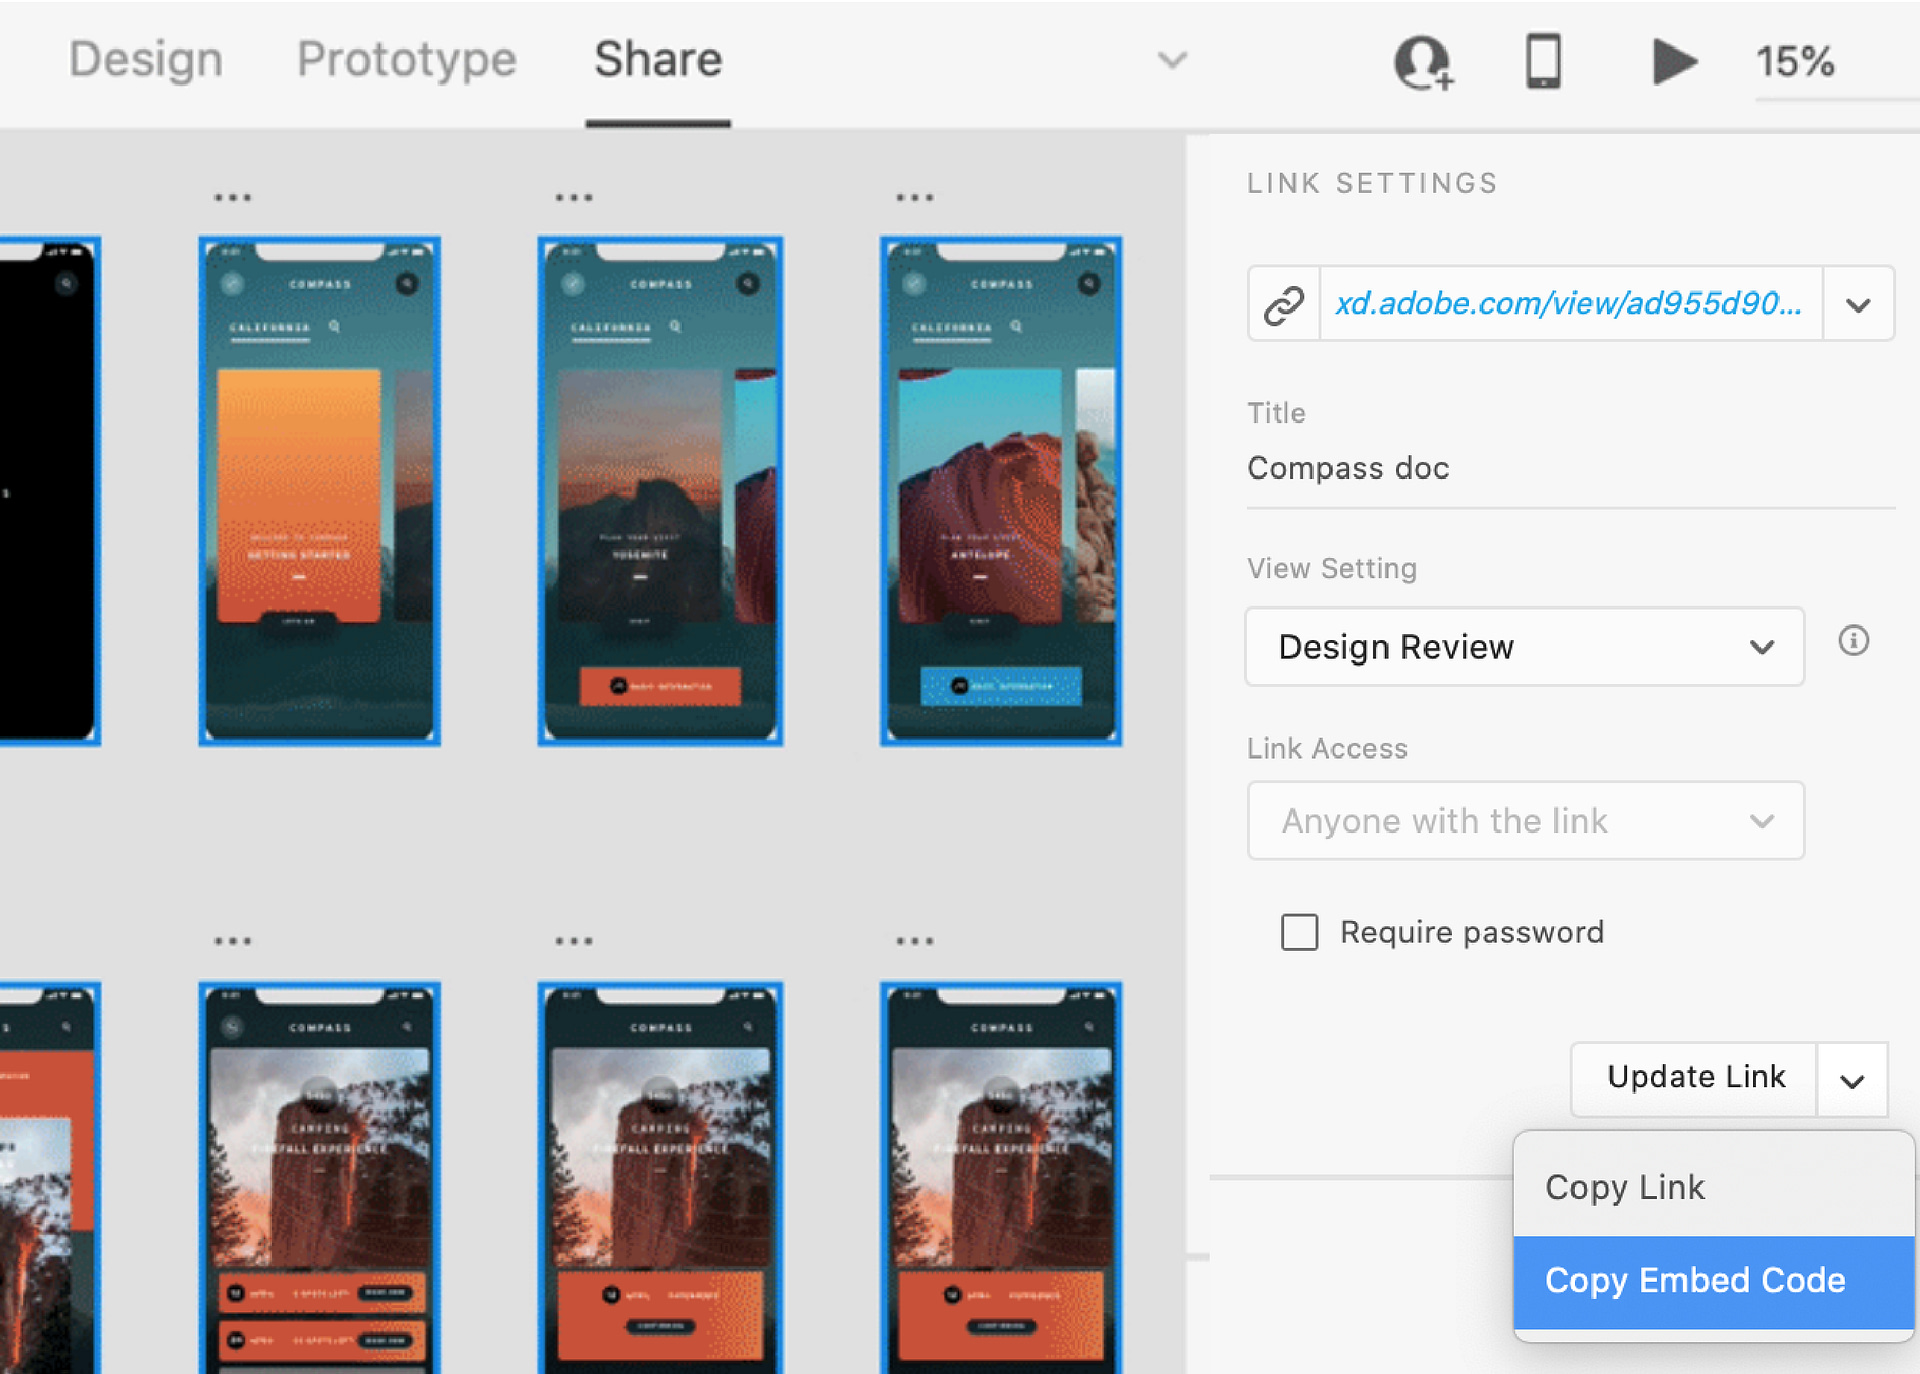
When you are done with each stage of web design, and you want to share your work with your colleagues, you can use the Share tab and share the code with developers or upload your work to the creative cloud.
It is absolutely free to download and use for designs. However, if you want to start sharing prototypes continuously, you will need to purchase the paid package. It is only $10 and you can also use the [free trial](https://www.adobe.com/products/xd/pricing/free-trial.html#:~:text=Is Adobe XD free%3F,until after your trial ends.) to see if the paid version works for you.
Working with Adobe XD for web design is less about the knowledge of how-to and rather about the experience of working with it. You need to take your time with different parts of the Adobe XD software, and spend lots of time to get a hang of it. If you feel like you would like to use professional help for web design, you can consult our professionals at PengYi Labs who have years of experience as UI & UX designers. Whether you choose Adobe XD, Figma, or any other tool, make sure you get the best out of it.